1. Introduction
1.1 The Rise of Commercial Solar in New Zealand
Across New Zealand, more and more businesses are turning to solar energy as a reliable and cost-effective way to power their operations. Driven by rising electricity prices, sustainability targets, and falling solar installation costs, commercial solar has moved from a “green option” to a mainstream business investment.
From large warehouses and manufacturing sites to offices and retail complexes, companies are leveraging solar to reduce operating expenses, hedge against energy price volatility, and demonstrate environmental leadership.
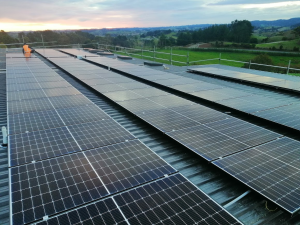
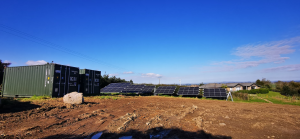
Project 1: Dairy Flat 33KW
1.2 Why Solar Is a Strategic Business Decision
Installing a commercial solar photovoltaic (PV) system enables a business to generate clean electricity directly from its premises, cutting reliance on grid-supplied power and stabilising long-term energy costs.
Beyond lowering electricity bills, solar energy offers tangible business advantages:
- Predictable, inflation-resistant energy costs
- Enhanced corporate sustainability credentials (ESG, carbon-neutral goals)
- Improved building asset value and tenant appeal
- Positive brand reputation among environmentally conscious customers and partners
- For many organisations, solar power is no longer just about sustainability — it’s about strategic financial performance.
1.3 What This Guide Will Cover
This comprehensive guide explains every key factor you need to understand before investing in a commercial solar system in New Zealand. It includes:
- ROI analysis — comparing upfront system cost versus annual electricity savings
- Financing models — one-off purchase versus Power Purchase Agreements (PPA)
- Grid-connection process — using Auckland as a practical example
- Performance monitoring & after-sales service — maintaining efficiency and reliability
- Government tax incentives — including the IRD’s Investment Boost policy
- Installation timeline & safety — how to plan around construction and minimise operational disruption
1.4 Who Should Read This Guide
This article is designed for:
- Business owners seeking to lower long-term operating costs
- Facility and energy managers responsible for sustainability and infrastructure
- Property developers and investors exploring rooftop solar opportunities
- Sustainability officers building corporate decarbonisation strategies
By the end, you’ll have a clear, data-driven understanding of how commercial solar works — from financial return and compliance to monitoring and maintenance — empowering you to make an informed, confident investment decision.
2. What Is Commercial Solar?
2.1 Definition and Overview
Commercial solar refers to photovoltaic (PV) power systems designed specifically for business and industrial properties rather than residential homes. These systems convert sunlight into usable electricity that can power offices, factories, warehouses, retail centres, and other commercial facilities.
Unlike small-scale residential installations, commercial solar systems are typically larger in capacity, often ranging from 30 kW to 1 MW or more, and are tailored to meet a business’s unique energy profile and operational schedule.
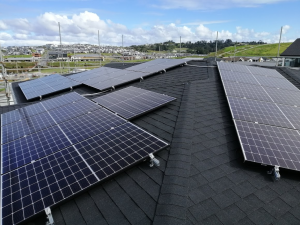
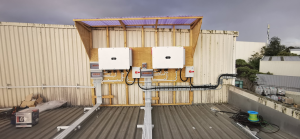
Project 2: Danimora 20KW
2.2 How Commercial Solar Works
A commercial solar system operates on the same fundamental principle as any PV installation:
- Solar panels absorb sunlight and convert it into direct current (DC) electricity.
- Inverters transform the DC power into alternating current (AC) suitable for business equipment and the local grid.
- The electricity produced can be used on-site to power operations, while any excess may be exported back to the grid under local network rules or sold to an energy retailer.
- An energy monitoring system tracks generation, performance, and consumption data to ensure long-term efficiency and reliability.
In most New Zealand commercial projects, systems are designed primarily for self-consumption, meaning the electricity generated is used directly within the facility rather than exported, maximising cost savings.
2.3 Typical System Configurations
Commercial solar solutions vary depending on the property type and available roof or ground area. The most common configurations include:
- Rooftop PV systems – installed on existing commercial or industrial roofs. Ideal for businesses with large, flat or low-slope roof space.
- Ground-mounted systems – used when roof conditions are unsuitable or additional land is available.
- Solar carports – dual-purpose installations that provide shaded parking while generating clean power.
Each configuration requires careful structural, electrical, and shading analysis to ensure optimal performance and compliance with New Zealand safety and building standards.
2.4 Benefits of Commercial Solar
Commercial solar delivers multiple advantages that extend beyond electricity savings:
- Reduced operating costs: lower energy bills and protection from rising grid prices.
- Sustainability performance: visible progress toward carbon-neutral and ESG commitments.
- Improved property value: buildings with on-site renewable energy are more attractive to tenants and buyers.
- Energy independence: reduced exposure to grid outages and market price fluctuations.
- Positive brand image: demonstrates environmental responsibility to customers, investors, and the community.
In many cases, the financial and environmental benefits combine to make solar one of the most strategically valuable capital improvements a business can undertake.
2.5 Key Differences Between Commercial and Residential Solar
|
Aspect |
Commercial Solar |
Residential Solar |
|---|---|---|
|
System Size |
30 kW – 1 MW + |
3 – 10 kW |
|
Design Focus |
Optimised for daytime business loads |
Sized for household use |
|
Installation Site |
Large roof spaces, industrial sites, or carparks |
Home rooftops |
|
Financing Options |
Purchase, lease, or PPA agreements |
Usually owner-funded or bank-financed |
|
Regulatory Requirements |
More complex grid-connection approvals |
Simplified small-scale connection |
|
Monitoring & Maintenance |
Advanced data analytics and service contracts |
Basic household monitoring |
Understanding these distinctions helps businesses evaluate system scale, technical requirements, and potential ROI more accurately.
2.6 When to Consider Commercial Solar
Commercial solar becomes most compelling when:
- Your facility operates mainly during daylight hours, allowing high self-consumption.
- Your electricity bills are consistently high, especially during business hours.
- You plan to own or occupy the property long-term.
- You want to demonstrate sustainability leadership or achieve Green Star/Toitū certification.
- You’re exploring ways to stabilise operating costs and increase asset value.
3. ROI Analysis: System Cost vs Annual Power Bill Savings
3.1 Understanding the Components of System Cost
The total investment for a commercial solar system is made up of several key elements:
- Equipment: solar panels, inverters, mounting frames, cabling, and monitoring systems.
- Installation and engineering: labour, scaffolding, and on-site safety measures.
- Structural and electrical upgrades: roof strengthening, switchboard modifications, or metering adjustments where required.
- Permitting and grid-connection approvals: documentation, inspections, and compliance with local network standards (e.g. Vector in Auckland).
Together, these costs determine the capital expenditure (CAPEX) of the system. In New Zealand, turnkey commercial solar projects typically range from NZD $900 – $1,200 per kW installed, depending on size and site complexity.
3.2 How Solar Reduces Annual Electricity Costs
Commercial solar systems deliver savings through three main mechanisms:
- Self-consumption: using solar electricity directly during daylight hours to offset grid power purchases.
- Reduced grid imports: lowering the volume of electricity bought from energy retailers.
- Export revenue (if applicable): selling surplus electricity back to the grid under retailer export rates.
Because most commercial sites operate during the day, they achieve very high self-consumption ratios — often above 85–90 %. This maximises the value of each kilowatt-hour generated and shortens the payback period.
3.3 ROI Calculation Logic
A simple payback period is calculated as:
For example, if a 180 kW system costs NZD $200,000 and saves NZD $40,000 per year, the simple payback is five years.
However, many businesses also analyse the Net Present Value (NPV) of future savings to capture the full financial benefit over the 25-year lifespan. NPV considers electricity inflation, maintenance costs, and discount rates, providing a more realistic picture of return on investment.
3.4 Typical ROI in New Zealand
Across New Zealand, commercial solar projects generally achieve payback periods of four to seven years, depending on:
- Self-consumption percentage
- Local electricity tariff and export rate
- System size and installation cost
- Panel and inverter efficiency
- Daytime load profile and seasonal variation
After the payback point, the system continues to generate free electricity for 15–20 years, delivering strong long-term cash flow benefits.
3.5 Case Study: Auckland Commercial Solar Installation
Client Profile:
A commercial business with high daytime electricity usage (7:00 AM – 6:00 PM), minimal evening consumption, and a strong commitment to sustainability.
|
Metric |
Estimate (Annual) |
|---|---|
|
Annual Energy Production |
235,000 – 255,000 kWh |
|
Self-Consumption Rate |
≥ 90 % (based on load profile) |
|
Annual Electricity Savings |
NZD $60,000 – $70,000 (at $0.26/kWh) |
|
Estimated Payback Period |
4.5 – 6 years |
|
System Lifespan |
25 + years (with minimal maintenance) |
Project Details
|
Parameter |
Value |
|---|---|
|
Project Type |
Commercial |
|
Date |
March 2025 |
|
Location |
Auckland, NZ |
|
System Size |
184 kW |
|
Solar Panels |
420 |
|
Energy Storage |
None |
|
Operation Hours |
7:00 AM – 6:00 PM |
|
Installer |
Solar Republic |
This project demonstrates how a well-matched solar system can offset almost all daytime consumption, producing over 240 MWh of clean electricity each year and saving roughly NZD $65,000 annually. With minimal maintenance and stable output, the system is expected to generate more than NZD $1.5 million in lifetime energy savings.
3.7 Why Choose Solar Republic for Your Business Solar in Auckland
Expertise and Customised Solutions
Solar Republic designs systems tailored to each client’s energy profile, site conditions, and financial objectives.
High-Quality Components and Technology
We use Tier-1 panels and advanced inverter technology to ensure maximum efficiency and long-term reliability.
Commitment to Sustainability and Customer Satisfaction
From design and approval to monitoring and after-sales service, we help New Zealand businesses achieve both financial and environmental goals.
4. Ownership Models: Turn-Key Solar System vs Power Purchase Agreement (PPA)
When investing in a commercial solar system in New Zealand, businesses generally choose between two main ownership and financing models:
- Turn-Key Solar System (CAPEX Model)
- Power Purchase Agreement (PPA Model)
Both approaches can significantly reduce long-term electricity costs and carbon emissions, but they differ in capital outlay, asset ownership, financial treatment, and risk allocation.
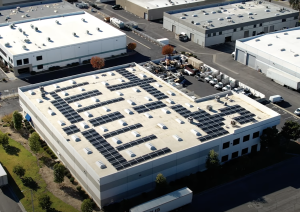
Project 3: Queenstown 200KW
4.1 Turn-Key Solar System (CAPEX Model)
If your business seeks maximum ROI, full system control, and long-term energy independence, a turn-key solar purchase is the preferred approach.
Under this model, your company makes a one-time capital investment to purchase and own the entire solar system. A professional solar engineering team like Solar Republic manages the project end-to-end — including feasibility analysis, design, grid application, installation, and commissioning — using high-quality components designed for long-term performance.
Key Advantages
- Full asset ownership – The system is recorded as a fixed asset on your balance sheet.
- Maximum savings and ROI – All electricity savings and export income go directly to your business.
- Tax benefits – Eligible for the Investment Boost incentive, which provides an immediate 20% deduction on new asset costs, with the remaining 80% depreciated over time — improving early cash flow.
- Energy independence – Protect your business from future electricity price increases and gain greater long-term cost stability.
- Quality and performance control – You decide the equipment, warranties, and maintenance strategy to ensure maximum reliability and system output.
Considerations
- Requires higher upfront capital expenditure (CAPEX).
- The business is responsible for system performance and maintenance (though this can be outsourced under a service contract).
- If the site is sold or relocated, system transfer or redeployment planning is required.
For businesses with stable premises and a long-term investment outlook, owning your solar system provides the highest lifetime financial return — one investment, decades of clean energy savings.
4.2 Power Purchase Agreement (PPA Model)
If your business prefers a zero-upfront-cost and low-risk path to solar energy, a Power Purchase Agreement (PPA) may be ideal.
Under a PPA, a third-party solar provider (the investor) funds, owns, and maintains the solar system installed on your site. Your business simply buys the electricity generated at a fixed rate — typically 10–30% lower than the standard grid tariff — achieving cost savings from day one.
Key Advantages
- Zero upfront cost – No capital investment; preserve cash flow for core business operations.
- Lower, fixed energy rates – Pay a stable per-kWh rate that’s usually below retail electricity prices.
- No maintenance responsibility – The provider handles all system operation, maintenance, insurance, and performance monitoring.
- Immediate sustainability impact – Reduce your carbon footprint and strengthen ESG credentials.
- Ideal for tenants or multi-site businesses – Suitable for leased facilities or businesses seeking predictable long-term energy costs.
Contract Structure
Typical contract duration: 10–20 years, depending on system size and commercial terms.
At the end of the term, you may:
- Extend the PPA,
- Purchase the system at fair market value, or
- Have it removed at no additional cost.
Considerations
- The provider retains ownership of the system.
- Contracts may include minimum usage or term commitments.
- For leased properties, ensure transfer clauses are clear in case of tenancy changes.
4.3 Summary Comparison
|
Category |
Turn-Key (CAPEX) |
PPA (Power Purchase Agreement) |
|---|---|---|
|
Upfront cost |
High (capital expenditure) |
None (provider-funded) |
|
System ownership |
Business |
Solar provider |
|
Savings & ROI |
100% of savings retained |
Savings via discounted energy rate |
|
Maintenance |
Business responsibility |
Provider responsibility |
|
Tax treatment |
Eligible for depreciation & Investment Boost |
Treated as operating expense |
|
Long-term saving |
Greater long-term savings after system payback |
Lower total savings over time due to purchase of power from provider |
|
Monthly payment |
None after system is paid off, only minor O&M cost |
Fixed monthly payment based on solar energy consumption |
|
Best suited for |
Owner-occupied, long-term facilities |
Leased sites, cashflow-sensitive businesses |
|
Contract term |
Asset lifespan (20–25 years) |
10–20 years |
4.4 Choosing the Right Model
Your ideal solar ownership model depends on your financial strategy and property situation:
- If your goal is maximum ROI, full control, and asset value, choose a Turn-Key CAPEX model.
- If you want immediate cost savings, no upfront spend, and predictable pricing, a PPA provides a simple, low-risk way to switch to clean energy.
In practice, many Auckland businesses start with a PPA on a leased facility to test solar performance and savings, then move to full ownership (CAPEX) on their own properties once results are proven.
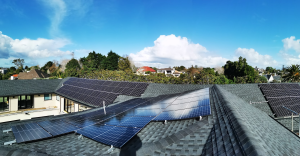
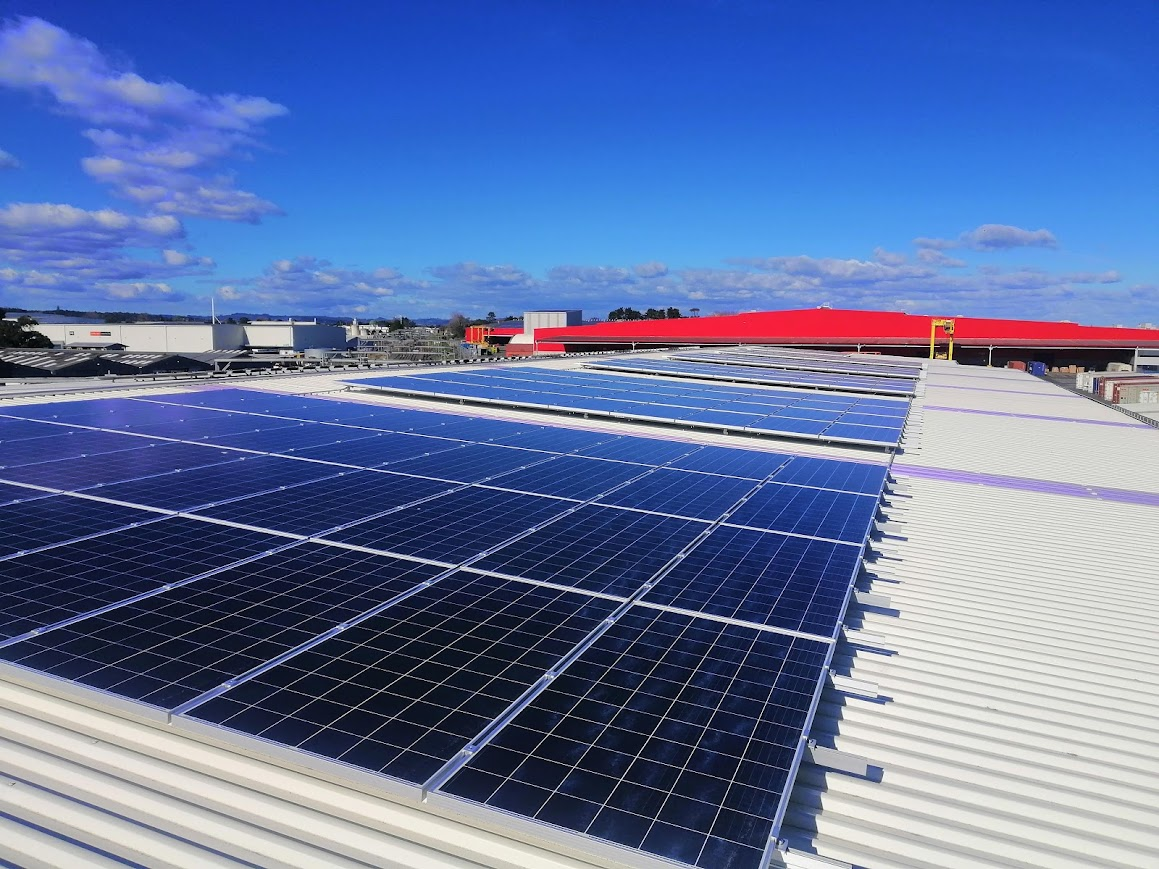
Project 4: Otahuhu 77KW
5. Grid Connection Approval & Standards
Connecting a commercial solar system to the electricity grid in New Zealand requires approval from your local network company (lines company) and must comply with national electrical and safety standards.
This process ensures the system operates safely, does not interfere with the grid, and meets all regulatory requirements before export or parallel operation.
5.1 Key Regulatory Framework
In New Zealand, grid connection for solar photovoltaic (PV) systems is governed by several key regulations and industry codes:
- Electricity Industry Participation Code 2010 (Part 6) – outlines the technical and procedural requirements for distributed generation (DG) systems connecting to the grid.
- AS/NZS 4777.1 & 4777.2 Standards – specify inverter compliance, protection settings, and connection requirements for grid-connected inverters.
- Electricity (Safety) Regulations 2010 – cover electrical installation safety, certification, and inspection.
- Distribution company policies – each network (e.g. Vector in Auckland) may have its own DG approval process, application forms, and capacity limits.
Before installation, both the network operator and your electricity retailer must be notified — especially if you plan to export excess power back to the grid.
5.2 The Auckland Example – Vector Network
Auckland’s main distribution company, Vector Limited, manages grid access for most of the city’s commercial and industrial sites.
Connecting a solar PV system to Vector’s network involves a three-stage process:
Application / Pre-Approval
- Submit a Distributed Generation Application form to Vector.
- Provide system design details: inverter make/model, capacity (kW), expected annual generation, export capability, and single-line diagram.
- Vector assesses the local network’s capacity, transformer limits, and voltage stability to ensure safe connection.
Technical Review & Conditions
- For small commercial systems (typically under 10 kW export), approval is often straightforward.
- Larger systems (above 10 kW export) may require detailed engineering assessment, protection studies, and possibly network upgrades or export limitation devices.
- All inverters must be AS/NZS 4777-certified and comply with Vector’s voltage and frequency ride-through standards.
Installation, Inspection & Connection
- Installation must be carried out by a registered electrician with a Certificate of Compliance (CoC) and Electrical Safety Certificate (ESC) issued.
- Once installed, your solar provider coordinates with Vector to complete on-site verification and meter reconfiguration (bi-directional metering).
- After final approval, the system can operate in parallel with the grid, exporting excess generation where permitted.
You can find Vector’s distributed generation documentation at: www.vector.co.nz/personal/solar
5.3 Connection Standards and Best Practices
To ensure a smooth and compliant connection, businesses in Auckland should:
- Engage your network early – submit preliminary system details during the design phase to confirm local capacity.
- Use compliant equipment – ensure all inverters are listed on the EECA/WorkSafe approved inverter register.
- Include export limitation where needed – some urban zones may restrict how much power you can send to the grid; a smart export limiter prevents rejection.
- Plan for metering upgrades – older sites may require a new import/export smart meter for accurate billing and buy-back.
- Maintain documentation – retain all technical drawings, CoC/ESC certificates, and Vector’s approval letter for auditing or future expansion.
5.4 Typical Timeframe
- Pre-approval review: 1–3 weeks for small systems; up to 4–8 weeks for large or complex sites.
- Installation & inspection: 1–4 weeks depending on system size.
- Metering and final approval: usually within 1–2 weeks after inspection.
Total duration (from submission to operation) for most commercial systems in Auckland ranges from 4 to 10 weeks, depending on complexity and export requirements.
5.5 Summary
Grid connection in Auckland follows a clear but structured process — submit a compliant design, use certified equipment, and coordinate early with Vector and your electricity retailer.
By adhering to these standards, your business ensures safe operation, reliable performance, and eligibility to export surplus power at the agreed buy-back rate.
Project 5: Auckland East Lifestyle 30KW
6. Data Monitoring, System Efficiency & After-Sales Support
Installing a solar system is only the beginning. To achieve consistent performance, accurate reporting, and long-term savings, real-time data monitoring and professional after-sales service are essential.
6.1 Why Monitoring Matters
A well-designed monitoring system gives your business full visibility into how your solar installation performs day-to-day.
Through cloud-based dashboards or mobile apps, you can track key indicators such as:
- Daily, monthly, and annual generation (kWh) – understand how much energy your system is producing over time.
- System efficiency (kWh/kW) – compare actual performance against expected yield to detect degradation or faults early.
- Self-consumption ratio – see how much of your solar power is used on-site versus exported to the grid.
- Environmental benefits – measure CO₂ savings to support sustainability and ESG reporting.
With accurate data, you can verify your return on investment (ROI), adjust operations to increase self-consumption, and ensure that the system continues to deliver as promised.
6.2 What to Monitor
|
Parameter |
Purpose |
Typical Frequency |
|---|---|---|
|
Solar generation (kWh) |
Tracks total energy produced by the system |
Real-time / daily |
|
Performance ratio (PR) |
Indicates system efficiency relative to solar irradiance |
Daily / monthly |
|
Inverter output & status |
Detects underperformance, errors, or shutdowns |
Real-time |
|
Module temperature & string voltage |
Identifies shading, wiring, or degradation issues |
Continuous / on demand |
|
Export vs. self-use |
Optimises energy management and ROI |
Monthly |
|
Weather & irradiance data |
Normalises performance comparisons |
Daily |
Many commercial systems use smart monitoring platforms (e.g., SolarEdge, Fronius, Huawei, Enphase, or custom SCADA systems) that integrate with the site’s energy management tools. These systems can issue automatic alerts for power loss, inverter faults, or unexpected drops in output.
6.3 Efficiency and Stability Over Time
Solar systems are designed for 25+ years of operation, but performance naturally declines at about 0.5–0.7% per year due to module degradation.
Consistent monitoring helps identify issues that can accelerate this loss — such as dirt accumulation, inverter malfunction, or shading from new structures.
Best practices for stable long-term efficiency:
- Schedule preventive maintenance every 6–12 months, including panel cleaning and visual inspections.
- Check inverter logs monthly for error codes or unexpected shutdowns.
- Review performance ratio (PR) regularly and compare it against the design baseline.
- Benchmark output annually against expected generation (typically 1,200–1,400 kWh/kW·year in Auckland conditions).
- Track degradation trends — if annual generation drops faster than expected, arrange professional diagnostics.
6.4 After-Sales Support & Service Agreements
Reliable after-sales service is critical for protecting your investment and ensuring that your ROI projections hold true.
A comprehensive Operations & Maintenance (O&M) package should include:
- Scheduled inspections and preventive maintenance
- Remote monitoring and performance analytics
- Fault detection and on-site repair
- Component replacement under warranty (modules, inverters, monitoring devices)
- Regular reporting on energy production, efficiency, and CO₂ reduction
Reputable solar providers offer long-term warranties — typically 10–12 years for inverters and 25–30 years for panels — along with optional performance guarantees ensuring the system delivers a minimum percentage of rated output each year.
6.5 Integration With Business Operations
For larger sites, solar monitoring can be linked with the building’s Energy Management System (EMS) or SCADA platform, enabling advanced features such as:
- Load shifting and peak-demand reduction
- Automatic alerts for equipment faults
- Integration with battery storage and EV charging
- Centralised performance reporting across multiple sites
These integrations help facility managers align solar generation with operational energy demand, maximising self-consumption and efficiency.
6.6 Summary
Data monitoring is the foundation of long-term solar performance.
By combining real-time analytics, preventive maintenance, and strong after-sales support, businesses can maintain stable efficiency, extend system lifespan, and ensure that every kilowatt of solar energy contributes to lasting savings and sustainability goals.
7. Tax Incentives: The New Zealand “Investment Boost”
The New Zealand Government introduced the Investment Boost initiative on 22 May 2025, designed to encourage businesses to invest in new productive assets such as solar energy systems.
For companies purchasing a commercial solar system under a CAPEX (Turn-Key) model, this policy can significantly enhance cash flow and improve the overall return on investment (ROI).
Project 6: Otahuhu Supermarkt
7.1 Key Features of the Investment Boost
According to the Inland Revenue (IRD), the Investment Boost allows qualifying businesses to:
- Claim an immediate deduction of 20% of the cost of a new asset that is first available for use on or after 22 May 2025.
- Depreciate the remaining 80% of the asset’s cost under the normal depreciation rules.
- Apply the deduction to an unlimited asset value — there is no cap on the amount that can qualify.
- Use the scheme regardless of business size; it applies to both SMEs and large enterprises.
- Choose whether to opt in — the Investment Boost is optional, and businesses can continue to use standard depreciation if preferred.
Official reference: Inland Revenue – Investment Boost
7.2 How It Benefits Commercial Solar
For businesses investing in a commercial rooftop solar PV system, this incentive provides a clear financial advantage:
- Solar systems are treated as depreciable business assets, qualifying under the Investment Boost as long as they are new and first used in New Zealand after 22 May 2025.
- Claiming the 20% deduction in the year of installation reduces taxable income and improves that year’s cash flow.
- The remaining 80% of the system value continues to depreciate over future years, providing ongoing tax benefits.
- The earlier tax relief shortens the payback period and improves overall project ROI.
7.3 Conditions & Eligibility
To qualify for the Investment Boost, businesses must ensure:
- The asset is new or first used in New Zealand — second-hand assets generally do not qualify.
- The asset is available for business use and first becomes available on or after 22 May 2025.
- Accurate records are kept for asset cost, commissioning date, and depreciation basis.
- If the asset is later sold, part of the deduction may be clawed back (recovered) as taxable income.
- Businesses operating at a tax loss may still claim the deduction, but the cash-flow impact will differ depending on their tax position.
7.4 Example: ROI with Investment Boost
Let’s revisit the earlier Auckland example — a 100 kW rooftop solar system costing NZ $140,000 (CAPEX model).
|
Item |
Without Investment Boost |
With Investment Boost |
|---|---|---|
|
System cost |
$140,000 |
$140,000 |
|
Immediate deduction |
– |
20% × $140,000 = $28,000 |
|
Tax rate |
28% |
28% |
|
Tax saving (cash benefit) |
– |
28% × $28,000 = $7,840 |
|
Effective net cost (after tax) |
$140,000 |
$132,160 |
|
ROI improvement |
– |
Payback period shortened by roughly 3–4 months |
This upfront tax deduction directly improves cash flow, reducing the effective cost of the system and accelerating the return on investment.
7.5 Key Takeaways
- The Investment Boost provides an immediate 20% tax deduction for new assets, including commercial solar systems.
- The incentive significantly improves cash flow in the first year, enhancing project ROI.
- It applies only to new and business-use assets first available on or after 22 May 2025.
- The policy complements the Turn-Key (CAPEX) solar ownership model — an additional advantage compared with PPA financing.
- Always confirm eligibility and timing with your tax advisor or accountant before installation to ensure compliance and maximise the benefit.
7.6 Summary
With the Investment Boost, going solar isn’t just an environmental decision — it’s a strategic financial investment.
By combining annual electricity savings with accelerated tax deductions, businesses can achieve faster payback, stronger ROI, and greater long-term resilience against energy price volatility.
8. Installation Timeline, Safety, and Operational Impact
Installing a commercial solar system is a structured, well-managed process designed to minimise disruption to your business while ensuring the highest safety and quality standards.
In Auckland, professional solar providers typically follow a comprehensive project workflow — from feasibility to commissioning — aligned with both WorkSafe New Zealand and Vector (local network) requirements.
Project 7: Auckland Lifestyle 22kW
8.1 Typical Installation Timeline
While every site is different, a typical commercial solar project progresses through the following stages:
|
Project Phase |
Description |
Typical Duration |
|---|---|---|
|
1. Feasibility & site assessment |
Initial inspection, roof survey, and load analysis. Identifies technical constraints and optimal system size. |
1–2 weeks |
|
2. System design & proposal |
Engineering design, component selection, ROI modelling, and client approval. |
1–3 weeks |
|
3. Network application & approval |
Submit Distributed Generation (DG) application to Vector (Auckland). Approval time varies by size/export capacity. |
2–6 weeks |
|
4. Procurement & scheduling |
Ordering panels, inverters, and mounting hardware; finalising site logistics. |
1–2 weeks |
|
5. Installation & commissioning |
Physical installation, electrical connection, and system testing. |
1–3 weeks (depending on size) |
|
6. Metering upgrade & final approval |
Bi-directional meter setup and Vector’s grid connection confirmation. |
1–2 weeks |
|
Total timeframe |
From initial assessment to operation. |
6–12 weeks (typical) |
Large-scale commercial systems (> 250 kW) or complex multi-roof installations may take longer due to structural assessments and network export reviews.
8.2 Installation Safety Standards
Safety is a critical part of every commercial solar project.
All reputable installers in New Zealand must comply with:
- Health and Safety at Work Act 2015
- WorkSafe NZ Construction and Electrical Safety Guidelines
- Electricity (Safety) Regulations 2010
- AS/NZS 5033:2021 – Installation and safety requirements for PV systems
Key safety measures include:
- Comprehensive risk assessments and site-specific safety plans before any work begins.
- Certified scaffolding and fall protection for rooftop installations.
- Electrical isolation and lockout procedures during system connection.
- Fire and emergency management plans during and after installation.
- Strict adherence to safe access routes for staff and contractors.
Your provider should supply a Health & Safety documentation pack before installation begins, outlining all planned safety controls.
8.3 Minimising Business Disruption
A common question from business owners: “Will solar installation interrupt our operations?”
The answer — for most commercial sites — is no, or minimal.
- Non-intrusive scheduling: Installers coordinate around your operating hours, often working on weekends or outside peak business periods.
- Segmented installation: Large rooftops can be divided into zones, allowing work on one area while others remain active.
- Electrical work planning: Temporary power isolation is carefully scheduled in advance, typically lasting only a few hours.
- Noise and access control: Teams use designated access points to keep staff, tenants, and customers safe and undisturbed.
- Post-installation cleanup: Sites are returned to original condition, with no ongoing disruption to normal operations.
8.4 Roof Structure and Building Considerations
Before installation, engineers perform a roof structure assessment to confirm load-bearing capacity and roof integrity.
Commercial solar systems typically add 10–20 kg/m² — well within the limits of most modern commercial roofs, but verification is essential.
Checklist before installation:
- Roof condition and remaining lifespan (ideally 10+ years).
- Material compatibility (metal, membrane, concrete, etc.).
- Drainage and waterproofing inspections.
- Wind load and seismic compliance checks.
- Building warrant of fitness (if required for large-scale projects).
If the roof requires repairs or replacement within the next few years, it’s best to complete that work before the solar system is installed.
8.5 Commissioning and Handover
Once installation is complete:
- The system undergoes a final inspection and performance test by a certified electrician.
- You receive a Certificate of Compliance (CoC) and Electrical Safety Certificate (ESC).
- The provider submits final documentation to Vector and your electricity retailer for grid connection approval.
- Your monitoring platform is set up, and your team is trained to use it.
A professional installer should also provide a handover package containing:
- As-built drawings and layout plan
- Warranty documents
- Operation & maintenance manual
- Emergency contact procedures
Project 8: Food Process Factory 200KW
8.6 Summary
Installing a commercial solar system in Auckland is a smooth, carefully managed process that typically takes 6–12 weeks from planning to operation.
By engaging an accredited installer, following New Zealand safety standards, and coordinating closely with your operations team, you can ensure:
- Safe, compliant installation
- Minimal business disruption
- Protection of roof integrity
- Long-term operational reliability
9. Conclusion & Next Steps
9.1 Summary: Why Commercial Solar Makes Sense for New Zealand Businesses
Commercial solar energy has become one of the most practical and financially rewarding investments for New Zealand businesses.
In cities like Auckland, where electricity costs continue to rise and sustainability expectations grow stronger, solar power offers measurable advantages:
- Strong investment value — Typical ROI payback between 4–7 years, followed by decades of free electricity.
- Flexible ownership models — Choose between Turn-Key (CAPEX) ownership for maximum return, or Power Purchase Agreements (PPA) for zero-upfront access to clean energy.
- Streamlined approvals — Local network operators (e.g. Vector) provide clear distributed-generation guidelines, making grid connection straightforward when handled by qualified installers.
- Smart monitoring and after-sales support — Real-time data tracking ensures system efficiency, uptime, and performance transparency.
- Tax advantages — The IRD Investment Boost allows an immediate 20 % deduction for new business assets such as solar systems, improving first-year cash flow.
- Safe, efficient installation — With professional design and planning, solar projects can be completed quickly with minimal disruption to operations or roof integrity.
9.2 Recommended Next Steps for Your Business
To move forward confidently with a solar project, consider the following action plan:
Analyse your energy usage
- Review at least 12 months of electricity bills.
- Identify daytime vs night-time load and total annual consumption.
Assess your site feasibility
- Evaluate roof condition, available space, and structural capacity.
- Confirm roof orientation and shading conditions with a site survey.
Select your financial model
- Compare CAPEX (ownership) vs PPA (no-upfront-cost) options based on cash flow, tax position, and ownership goals.
Engage a qualified solar provider
- Work with an experienced, Auckland-based commercial installer like Solar Republic for design, grid application, and compliance.
Begin grid-connection and approval process
- Submit required documentation to your local network (e.g. Vector) early to avoid delays.
Plan for monitoring and maintenance
- Choose a data platform that tracks generation, performance, and cost savings.
- Arrange periodic inspections and cleaning to preserve efficiency.
9.3 Ready to Take the Next Step?
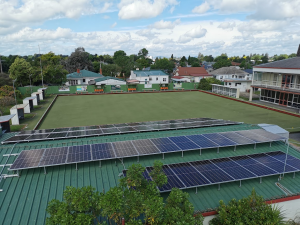
Project 9: Hamilton Club
If you’re considering solar for your business and would like:
- A detailed financial return model (ROI + NPV),
- Feasibility or tender documentation templates, or
- Monitoring system case studies,
Please contact our commercial solar team for a customised consultation or subscribe for further industry insights and practical tools. With the right preparation and professional guidance, your business can turn sunlight into a powerful, long-term financial asset — supporting both profitability and a cleaner energy future for New Zealand.

